
Hey there, beautiful people! Are you tired of digging through your makeup bag like it’s a treasure hunt in a messy, dirty cave? Do you feel like you need a SatNav just to find your favourite lipstick? Fear not, because today we’re going to give your makeup bag the makeover it deserves. Buckle up, buttercup, because we’re about to declutter and perform a makeup bag makeover like Marie Kondo on a caffeine high!
Let’s face it, we’ve all been guilty of hoarding makeup like it’s going out of style (spoiler alert: it’s not). But if your makeup bag is starting to resemble a graveyard for expired products and broken powders, it’s time to take action. Plus, who wants to lug around a makeup bag so bulging it doesn’t close could double as a weapon in case of emergency?
First things first, let’s channel our inner minimalist and do some serious decluttering. Grab your makeup bag, a bin, and get ready to Marie Kondo the hell out of it. Remember, if it doesn’t spark joy or serve a purpose, it’s time to bid it adieu.
Step 1: The Purge
Take everything out of your makeup bag and spread it out on a clean surface. Now, brace yourself, because it’s time to get ruthless. To start the makeup bag makeover, chuck out anything that’s expired, dried up, or just plain old.
Each product will have a little symbol on it with it’s shelf life shown. Usually an icon of a tub with a number and an ‘M’ for month on it – 6M, 12M etc. I’m not expecting you to have noted the date you bought each product but if you know for sure it was opened way before the shown shelf life, get rid. That definitely includes that 90’s blue eyeliner! Even if the product still seems to be working, the amount of bacteria living on that thing doesn’t bare thinking about.
Step 2: The Essentials
Now that we’ve cleared out the clutter, let’s focus on the essentials. Every makeup bag should have a few key items: foundation or tinted moisturiser, concealer, mascara, eyeliner, brow pencil, blush, and lipstick. These are your ride-or-die products that you will always reach for. Of course, you may not wear all of these on the list, so ignore the ones that are not part of your every day. And replace with any you can’t live without. Anything else is just extra baggage (pun intended).
Step 3: Quality Over Quantity
Repeat after me: quality over quantity. Instead of hoarding every eyeshadow palette known to mankind, invest in a few high-quality, versatile shades that you’ll actually use. Look for brands that prioritise eco-friendly packaging or build your own palettes like Hourglass or Kiko. That way you can carry one small palette with eyeshadows you will actually use and help the environment!
Step 4: Multi-Tasking Marvels
Who says you need a separate product for every thing? Embrace the magic of multi-tasking products. A tinted moisturiser with SPF? Yes, please. A lipstick that doubles as blush? Sign me up. This also goes for makeup brushes – look out for double ended brushes. Not only will you save space in your makeup bag, but you’ll also save some serious money.
Step 5: Keep It Clean & Stay Organised
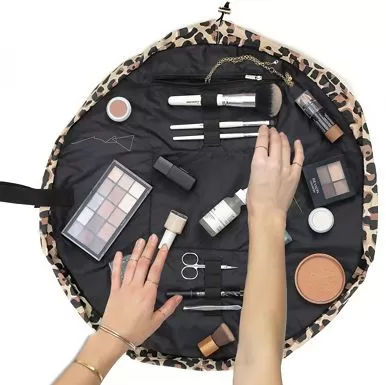
Now that your makeup bag is looking sleek and streamlined, let’s keep it that way. Give everything a wipe over with some antibacterial cleaner and sharpen any pencils. Invest in a makeup organiser or treat yourself to new makeup bag to keep everything clean, tidy and easily accessible. These bags by Flat Lay are great for this!
Congratulations, you’ve officially conquered the makeup bag makeover! Give yourself a pat on the back and admire your handiwork. Not only have you saved yourself a possible future eye infection, but you have a makeup bag that looks like it belongs on Pinterest. Now go ahead, step out with your head held high and your fresh new makeup bag under your arm.
Until next time, stay fabulous!
N x
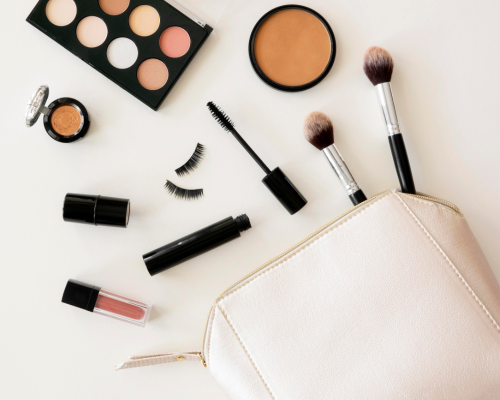
Take a look at what’s in my makeup bag…
Thanks for sharing informative article.